




How to replace a sensor?
Jan 14, 2026
Leave a message
In the realm of industrial automation and electronic systems, sensors play a pivotal role. They are the eyes and ears of these systems, constantly gathering data and providing crucial feedback. However, like any other component, sensors can wear out, malfunction, or become obsolete over time. As a reputable sensor supplier, I understand the importance of being able to replace sensors efficiently and correctly. In this blog post, I'll guide you through the process of replacing a sensor, covering everything from preparation to the actual replacement and testing.
Preparation
Before you embark on the sensor replacement journey, it's essential to take some preparatory steps. These steps will not only ensure your safety but also make the replacement process smoother and more efficient.
Gather Information
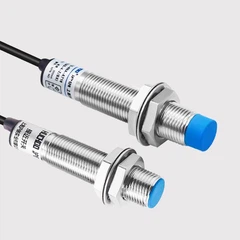
First and foremost, you need to gather all the necessary information about the sensor you're replacing. This includes the sensor's model number, specifications, and installation requirements. You can usually find this information on the sensor itself, in the system's documentation, or by contacting the manufacturer. For example, if you're replacing an E3JK-RR11-C 2M OMS Sensor, you'll need to know its operating voltage, sensing range, and mounting dimensions.
Select the Right Replacement Sensor
Once you have the information about the old sensor, you can start looking for a suitable replacement. As a sensor supplier, I offer a wide range of sensors to meet different needs. When selecting a replacement sensor, make sure it has the same or compatible specifications as the old one. This includes factors such as sensing technology (e.g., inductive, capacitive, photoelectric), output type (e.g., analog, digital), and environmental ratings. For instance, if the old sensor was an E2B-M12KN08-WZ-B1 Sensor with a specific sensing range and output type, the replacement should match these characteristics.
Gather Tools and Materials
In addition to the replacement sensor, you'll need to gather the necessary tools and materials for the replacement process. This may include screwdrivers, wrenches, pliers, wire strippers, and electrical tape. Make sure you have all the tools within reach before you start the replacement.
Safety First
Before you start working on the sensor, it's crucial to follow all safety procedures. This includes turning off the power to the system, wearing appropriate personal protective equipment (PPE) such as gloves and safety glasses, and following any lockout/tagout procedures if applicable. Safety should always be your top priority when working with electrical components.
Removing the Old Sensor
Once you've completed the preparation steps, you can start removing the old sensor. The process of removing the sensor may vary depending on its type and installation method. Here are some general steps to follow:
Disconnect the Power
As mentioned earlier, make sure the power to the system is turned off before you start working on the sensor. This will prevent any electrical shocks or damage to the sensor or the system.
Locate the Sensor
Find the location of the sensor within the system. It may be mounted on a bracket, a panel, or directly on the equipment. Take note of the sensor's orientation and any markings or labels that may help you during the installation of the new sensor.
Disconnect the Wires
Carefully disconnect the wires from the sensor. This may involve removing wire connectors, unscrewing terminal blocks, or cutting and stripping the wires. Make sure you label the wires or take pictures of the wiring connections before you disconnect them to ensure proper reconnection later.
Remove the Mounting Hardware
Depending on how the sensor is mounted, you may need to remove screws, bolts, or other mounting hardware. Use the appropriate tools to loosen and remove the hardware, and keep them in a safe place.


Remove the Sensor
Once the wires and mounting hardware are disconnected, you can carefully remove the old sensor from its mounting location. Be gentle to avoid damaging any surrounding components or the sensor itself.
Installing the New Sensor
After removing the old sensor, it's time to install the new one. Follow these steps to ensure a proper installation:
Prepare the New Sensor
Before installing the new sensor, make sure it's in good condition and has all the necessary accessories. Check the sensor for any damage or defects, and make sure the wiring connections are clean and secure.
Mount the Sensor
Position the new sensor in the same location as the old one, following the same orientation and alignment. Use the mounting hardware you removed earlier to secure the sensor in place. Make sure the sensor is tightly mounted to prevent any movement or vibration.
Connect the Wires
Reconnect the wires to the new sensor, following the labels or pictures you took earlier. Make sure the wires are properly connected and tightened to prevent any loose connections or electrical shorts. If necessary, use electrical tape to insulate the wire connections.
Check the Installation
Once the sensor is installed and the wires are connected, double-check the installation to make sure everything is in place. Make sure the sensor is securely mounted, the wires are properly connected, and there are no loose or exposed wires.
Testing the New Sensor
After installing the new sensor, it's important to test it to ensure it's working properly. Follow these steps to test the sensor:
Turn on the Power
Carefully turn on the power to the system, following all safety procedures. Make sure the power supply is within the specified range for the sensor.
Check the Sensor Output
Monitor the output of the sensor using a multimeter, a PLC, or other monitoring equipment. Make sure the sensor is producing the expected output signal. If the sensor is not producing the correct output, check the wiring connections, the sensor settings, and the system configuration.
Perform a Functional Test
If possible, perform a functional test of the sensor by exposing it to the appropriate stimulus. For example, if it's a proximity sensor, move an object within its sensing range and check if the sensor detects the object and produces the appropriate output signal. If the sensor fails the functional test, troubleshoot the problem and make any necessary adjustments or repairs.
Conclusion
Replacing a sensor may seem like a daunting task, but with the right preparation, tools, and knowledge, it can be a relatively straightforward process. As a sensor supplier, I'm committed to providing high-quality sensors and excellent customer support. If you have any questions or need assistance with sensor replacement or any other sensor-related issues, don't hesitate to contact me. I'm here to help you find the right solutions for your industrial automation and electronic system needs. Whether you're looking for an IE5338 Sensor or any other type of sensor, I have the expertise and products to meet your requirements.
If you're interested in purchasing sensors or discussing your sensor needs, please reach out to me. I'm always ready to assist you in finding the best sensor solutions for your applications.
References
- "Industrial Sensors Handbook" - A comprehensive guide to industrial sensors, their types, and applications.
- Manufacturer's documentation for the sensors mentioned in this blog post.
Send Inquiry